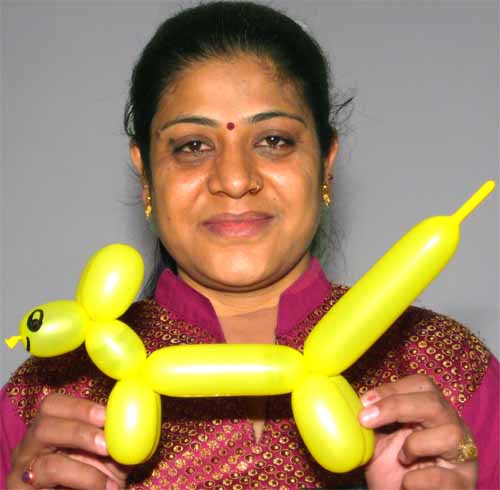
Watch the following video to learn how to make balloon dog. It is one of the easiest balloon animals which you can make as a beginner in balloon modelling.
You need 260Q balloon, balloon inflation pump, and marker pen to make balloon dog.
1. Inflate Your Balloon
First of all, inflate your 260Q balloon with the help of balloon inflation pump.
2. Tie the Knot
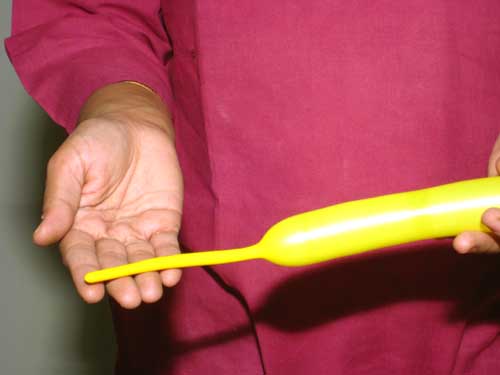
Before tying a knot at the mouth of the balloon, be sure to leave an empty tail at the another end of the balloon. Generally, the length of the empty tail is equal or more than your palm’s width.

When you will twist your balloon several times to shape the dog (or any desired shape), some amount of the air of the balloon will transfer to tail and it will protect your balloon from bursting.
3. Make Dog’s Face
Once, when you tied the knot at the opening of balloon, you can start your balloon modelling and balloon twisting.
Always start balloon sculpture from the tying end of the balloon.
To do this, hold your balloon’s mouth part in your left hand and hold the rest longer part of balloon in your right hand. Support your balloon sculpture from left hand as well as pinch the balloon during twisting from the left hand. Always twist the balloon from your right hand.

Decide the length of the face of your balloon dog. Pinch your balloon between the index finger and thumb of your left hand and twist the balloon 4-5 times from your right hand in clockwise direction.
4. Make 1 Ear of Your Balloon Dog
Decide the length of the ear of your balloon dog. Move your left hand forward, without releasing the face of the dog (otherwise the twisting will open).

Now pinch and twist the balloon 4-5 times to make ear same as you made the mouth.
5. Make 2nd Ear of Your Balloon Dog
Keep holding the mouth and 1st ear of your balloon dog, and bend the balloon just from the twisted end of 1st ear. Pinch the balloon in equal size of the 1st ear of the dog, and twist both the ears together 4-5 times.

By doing this, the mouth of the dog and both the ears will lock properly and now you can release them and set free.

6. Make Neck of Your Balloon Dog
Decide the length of the neck of your balloon dog.

Pinch and twist the balloon 4-5 times to make the neck of the balloon, and keep it hold.
7. Make 1st Front Leg of Your Balloon Dog
Make the 1st front leg of your balloon dog same as you made the 1st ear of the dog.

For this, hold the neck of the dog from the last two fingers of your left hand. Move your first two fingers of left hand forward. Now, pinch the balloon and twist it 4-5 times to make 1st front leg of your balloon dog.
8. Make 2nd Front Leg of Your Balloon Dog
Bend the balloon at the end of the twist of 1st leg of the dog.

Pinch the balloon at the equal size of 1st leg. Now, twist both the legs together to lock the neck and the front legs of the dog. Now you can release and set your dog free because the neck and the legs are locked.
9. Make Stomach of Your Balloon Dog
Decide the length of stomach of your balloon dog.

Pinch your balloon and twist 4-5 times to make the stomach of the balloon dog.
10. Make Rear Legs of Your Balloon Dog

Make the rear legs of your balloon dog exactly same as you made the front legs of your balloon dog.
11. Make Tail of Your Balloon Dog

After making the rear legs of the dog, the remaining balloon automatically becomes the tail of your balloon dog.
12. Mark Eyes and Smiley
With the help of soft tip marker pen, you can easily mark the eyes and smiley on the face of your balloon dog.

Your amazing, lovely, beautiful balloon dog is ready in very easy and quick steps.
- Subscribe Sonia Goyal at ekunji to get arts and crafts updates.
- Subscribe Sonia Goyal at Youtube channel for more arts and crafts videos.
- Join Sonia Goyal at Facebook
Subscribe Sonia Goyal to learn how to make balloon animals from balloon modelling and then rock your kids parties. Write your feedback and queries in comment area below.


Pingback: Balloon Modelling - How To Make Sword From Balloon Modelling
Pingback: Paper Craft Ideas For Kids to Make Beautiful Paper Chains